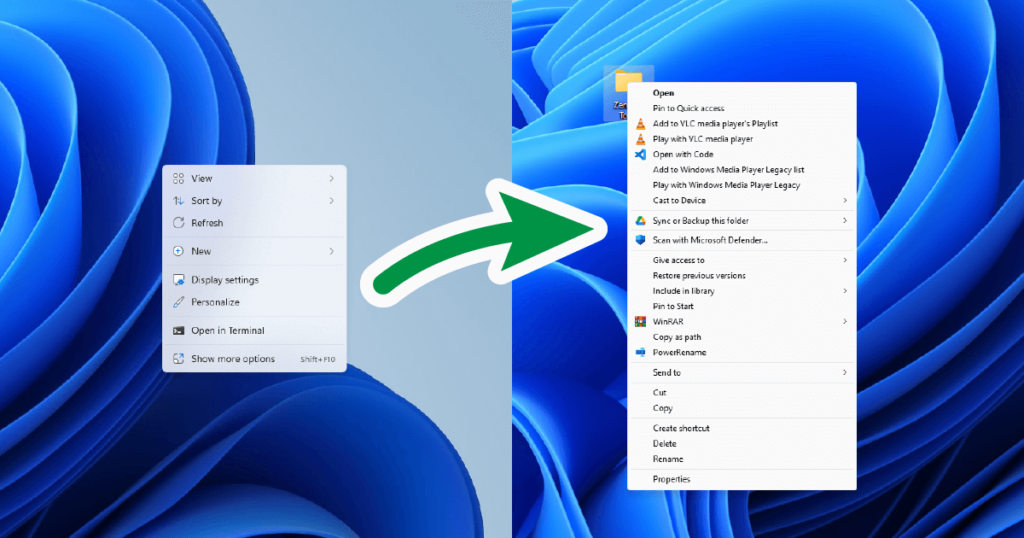
Let’s face it, after upgrading from Windows 10 to Windows 11, we missed the good old Windows 11 old context menu that we used to see in Windows 10. Personally speaking, I am not comfortable using the new one. Yes, it got its fancy new design and gorgeous icons but there are some missing items or areas that we always see in Windows 10 or older that I wish it stayed in the latest operating systems.
However, it is very easy to enable the old context menu and in this topic, I will share with you the easiest way to enable the old context menu in Windows 11 without using any other third-party software.
Go to:
The old context menu VS the new one
You might be wondering why would someone switches back to the old context menu when Windows 11 makes it simpler and slick looking. Well, sometimes simple design means there are features stripped away to increase the looks and that’s how modern software design works. In this case, Windows 11 removes the additional items in the menu and usually, these are items that are added by third-party programs or applications.
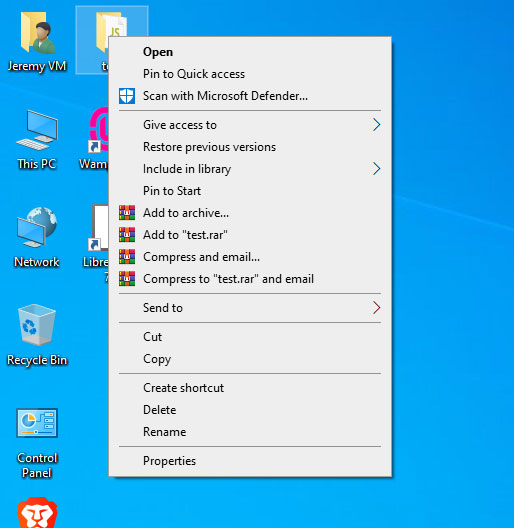
Here’s the old context menu from Windows 10:
And here’s the context menu in Windows 11:
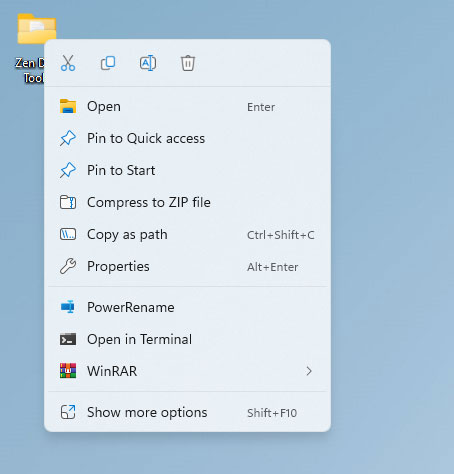
In the screenshots above, some of the items are removed such as the “Create shortcut”, “Give access to”, the list of options from the winRAR program, and more. These items are either grouped into single items or completely missing.
However, to access the missing items, you need to click “Show more options”. It may not be a big deal since it will only take a couple of seconds but for some, it does, especially for Windows power users.
Now, to remedy this, we simply need to bypass the new context menu and reveal the old context menu instead.
Enable old context menu
To enable the Windows 11 old context menu, you simply need to run a command in the Windows Run dialog and restart the Windows explorer.
This is the most effective and easiest method and it doesn’t require you to install any software or program. Here are the how-to steps to do it.
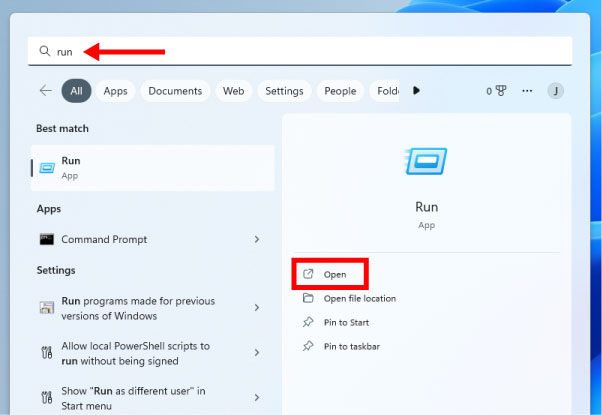
Step 1: Open Windows Run Dialog
Press Windows Key + R on your keyboard to access the Windows Run Dialog.
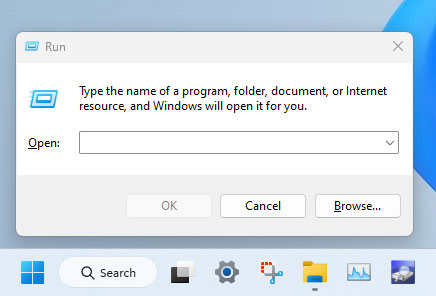
Or, you can search it in the Start menu.
Step 2: Execute a command in the Run Dialog
Execute the command below to disable the new Windows 11 context menu and press enter or the “OK” button:
reg.exe add "HKCU\Software\Classes\CLSID\{86ca1aa0-34aa-4e8b-a509-50c905bae2a2}\InprocServer32" /f /ve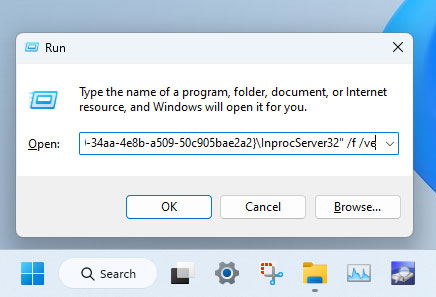
Step 3: Restart the Windows Explorer
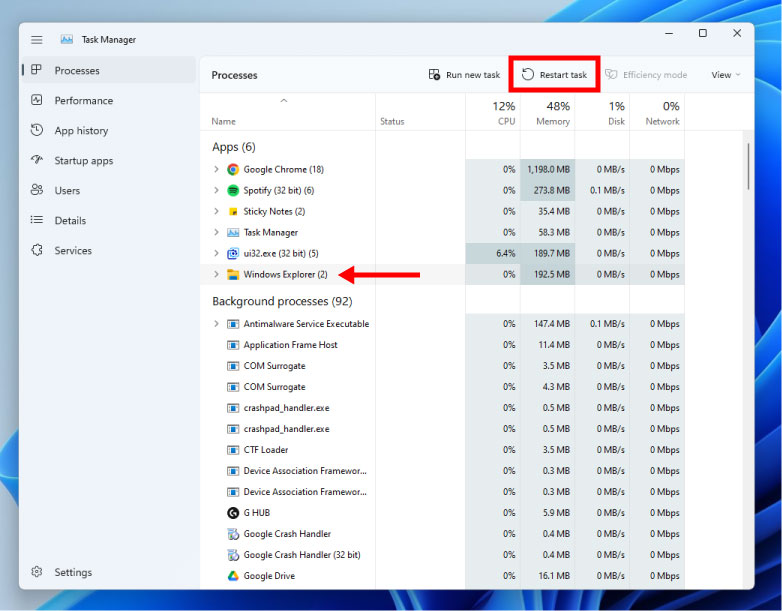
Open the Task Manager by pressing CTRL + Shift + ESC on your keyboard or you can search it in your Start menu as well.
Select the Windows Explorer in the process list and press the “Restart Task” button.
After restarting the Windows Explorer, this should enable the old context menu style.
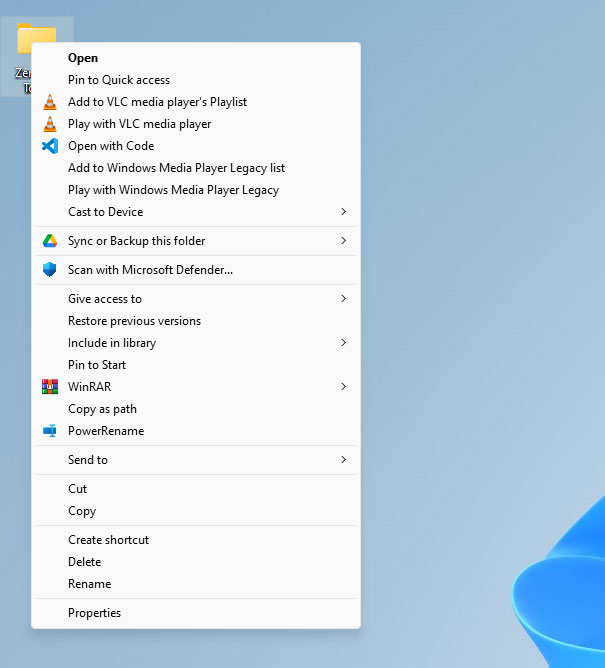
Thats it! You have now enabled the old context menu in Windows 11.
Re-enable the new Windows 11 context menu
To revert it back, you simply follow the same steps above but with a different command to execute in the Run Dialog.
Step 1: Open Windows Run Dialog
Press Windows Key + R on your keyboard to access the Windows Run Dialog.
Step 2: Execute a command in the Run Dialog
Execute the command below to enable back the new Windows 11 context menu and press enter or the “OK” button:
reg.exe delete "HKCU\Software\Classes\CLSID\{86ca1aa0-34aa-4e8b-a509-50c905bae2a2}" /fStep 3: Restart the Windows Explorer
Again, open the Task Manager by pressing CTRL + Shift + ESC on your keyboard or you can search it in your Start menu as well.
Select the Windows Explorer in the process list and press the “Restart Task” button.

